All versions of Windows XP CD are bootable. In.order to boot from CD/DVD-ROM you need to set the boot sequence. Look for the boot sequence under your BIOS setup and make sure that the first boot device is set to CD/DVD-ROM.
Perform the following steps to install Windows XP:
Perform the following steps to install Windows XP:
1.Insert the Windows XP CD into your computer (DVD/CD-ROM) and restart your computer.

2.
If prompted to start from the CD, press SPACEBAR. If you miss the prompt
(it only appears for a few seconds), restart your computer to try
again.Windows XP Setup begins. During this portion of setup, your mouse
will not work, so you must use the keyboard. On the Welcome to Setup
page, press ENTER.

3.
Almost immediately after Windows setup begins the screen shown to the
left will appear. Unless you have the very latest in hardware you
probably won't need to press the F6 key to install and SCSI or RAID
driver. Pressing F5 at this
point allows you to select the proper HAL. A full description of the
process is here.

4.
Once the initialization process completes, the screen in Figure
loads to guide the XP installation process.This guide deals with a clean
install and to accomplish that goal select the first option by pressing
Enter. If you wanted to use the Recovery Console with an already
completed XP installation, pressing R would be the proper choice. F3
ends the current installation process. After pressing Enter, setup will
search the drives for an existing XP installation.

5.Press F8 if you
agree to the terms or press Esc and start researching alternative
operating systems if you don't agree.

6.Press Enter.

7. since there is only the one hard disk it will be used to create the install partition by pressing C.
8. Once the partition creation has been initiated, the screen in Figure 07 opens and prompts for the size of the partition that will be created. As long as you adhere to the minimum and maximum listed on the screen you have the freedom to set partition sizes as you wish. Keep in mind that there are minimum space requirements to install XP. Set the size of the desired partition and press Enter.

9. Once the partition has been created you are returned to the screen in Figure 08. If there is still unallocated space on the drive and you want to create another partition, highlight the unallocated space entry and press C again to repeat the partition creation process. If you want to change the partition that was just created, highlight it using the up and down arrow keys and press D. A confirmation message will be displayed. Once you're satisfied with the partition scheme, highlight the desired install partition and press Enter.

10. The final step after creating and selecting the install partition is specifying the file system to use for formatting the partition. The available choices will be shown on the screen that appears as in Figure 09. In most cases you'll want to use NTFS. It's far more secure than FAT32 and supports permissions, encryption, and compression. The only reason for considering FAT32 would be data sharing with W9x/Me installations and since this scenario deals with a clean install it's not even a consideration.

12. The XP CD is back in the drive and the partition is being formatted.

13.copying windows files

14. Almost there; the configuration is being initialized.

15. Finally. A red progress bar that indicates the system will reboot in 15 seconds so the Graphical User Interface portion of setup can begin. If you're still awake, tap the Enter key to speed up that 15 seconds until restart. This is the end of the text portion of setup.


The majority of this setup phase
requires no user intervention. The screens contain a description of
Windows XP features. I can only assume they were created in an attempt
to kill the time while XP installs and provide a general time to
completion reference
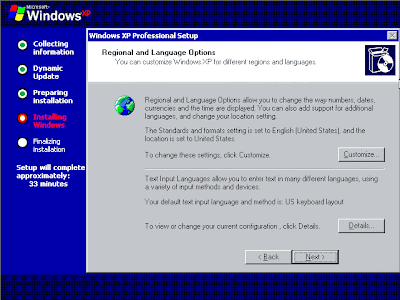
The first screen that requires any user input in this phase is Regional and Language Options. If you're using English and you do entry via the keyboard the defaults will suit you fine.
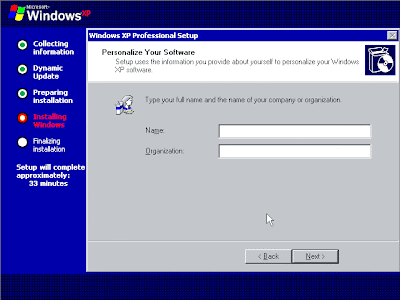
Somehow, typing my name and my company name doesn't exactly give me a warm fuzzy sense of personalization, but that's what the Personalize Your Software screen wants you to enter. I guess you could give some bogus information if it sends a little thrill through you to pull one over on Microsoft.
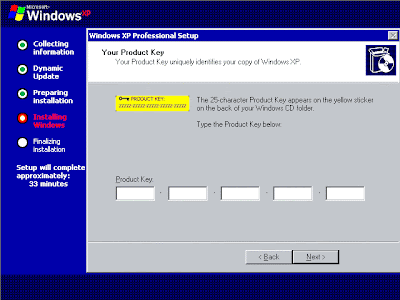
The screen everybody loves to hate; the dreaded Your Product Key screen. The XP installation process stops here if you don't have one, so for those of you leaving at this point, have a good day.
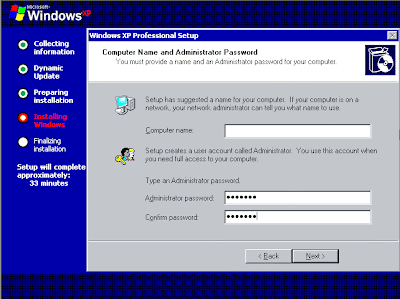
Installation is going to automatically assign a computer name in the Computer Name and Administrator Password screen.
Once you see the name it chooses you'll be grateful it can be easily
changed. The important part of this screen is the administrator
password. All the begging and pleading in the world can't make you
choose something that's hard to guess, but just remember that this one
single choice you're making right now is the key into everything you
hold near and dear (and private) in the world of computing. It's also
essential you remember the password, even if you aren't a case sensitive
type of guy/gal.
Unless you prefer to live in the past or future, Date and Time Settings should be set current.

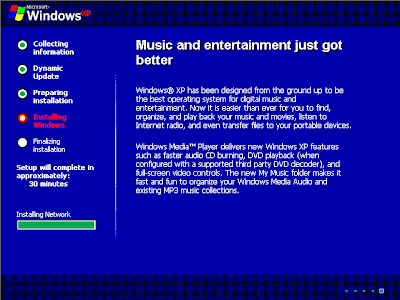
Music and Entertainment Just Got Better
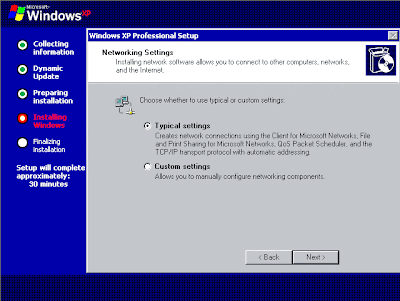
In Network Settings,
unless you have a good reason for selecting Custom Settings, go with
the Typical Settings. No matter how special you might think your setup
is, in most cases it will function perfectly well with the typical
settings.
 your computer and will automatically restart when finished. When the Display Settings dialog appears, click OK.
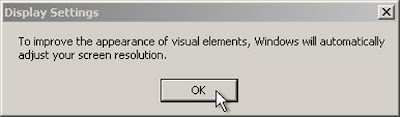
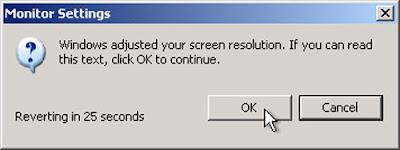
When the Monitor Settings dialog box appears, click OK.
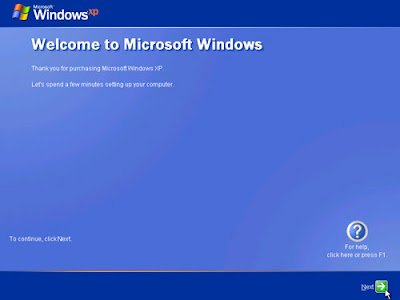
The final stage of setup begins. On the Welcome to Microsoft Windows page, click Next.
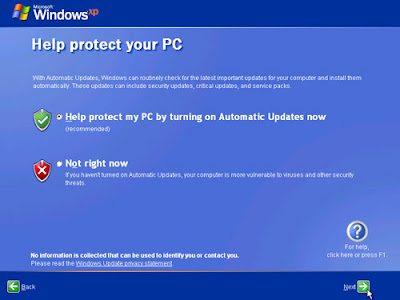
On the Help protect your PC page, click Help protect my PC by turning on Automatic Updates now. Then, click Next.(*if u do not use genuine skip it i.e not right now)
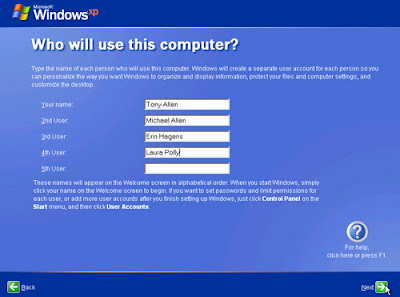
On the Who will use this computer? page, type the name of each person who will use the computer. You can use first names only, nicknames, or full names. Then click Next.
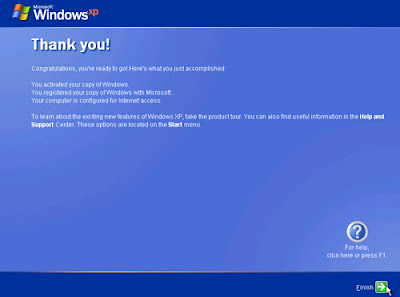
On the Thank you! page, click Finish.
welcome screen appear and see your first desktop.
No comments:
Post a Comment